
Adrian’s Plectrum Build
Adrians Plectrum Build - London
““As a Civil Engineer, the plan pack is concise and professionally presented, well laid out, thorough and generally easy to follow.””
Civil Engineer Adrian purchased our Plectrum plan pack and started his self-build in October 2025. This page documents his entire journey — from foundations to a fully working office, now in daily use, with cladding the final piece still to come..
Why Adrian Chose DIY:
The Numbers:
Installed Plectrum: £17,500
DIY from plan pack: ~£7,500
Saving: £10,500
Adrian's Review of the Plan Pack:
Background:
Adrian is a Civil Engineer with professional experience reading technical drawings and managing construction projects.
His verdict:
✅ "Concise and professionally presented"
✅ "Well laid out and thorough"
✅ "Generally easy to follow"
✅ "The glossary is great for explaining the numerous terms used"
✅ "The Quick Guides are great for providing an overview of what the drawings are showing and how to read them"
✅ "The build sequence is very helpful"
✅ "I particularly like the addition of the checklist, which will no doubt be useful during the build stage"
What impressed him:
“The plan pack build sequence gave me a good idea of what to expect so no big surprises.”
Constructive feedback:
Adrian identified 8 minor improvements (graphical errors, dimension clarifications, parts list updates), which we implemented within a few days and issued him with a revised document. This is exactly why we want more Founder's Circle members - real builders making our product better.
The timeline:
Ground screws:
2 hours
Structure:
2 days
Roof and edge trims:
1 weekend
Door and lining:
1 weekend
Interior finish and electrics:
1 weekend + time for electrician
Total project:
7-8 days
Build Diary October 2025:
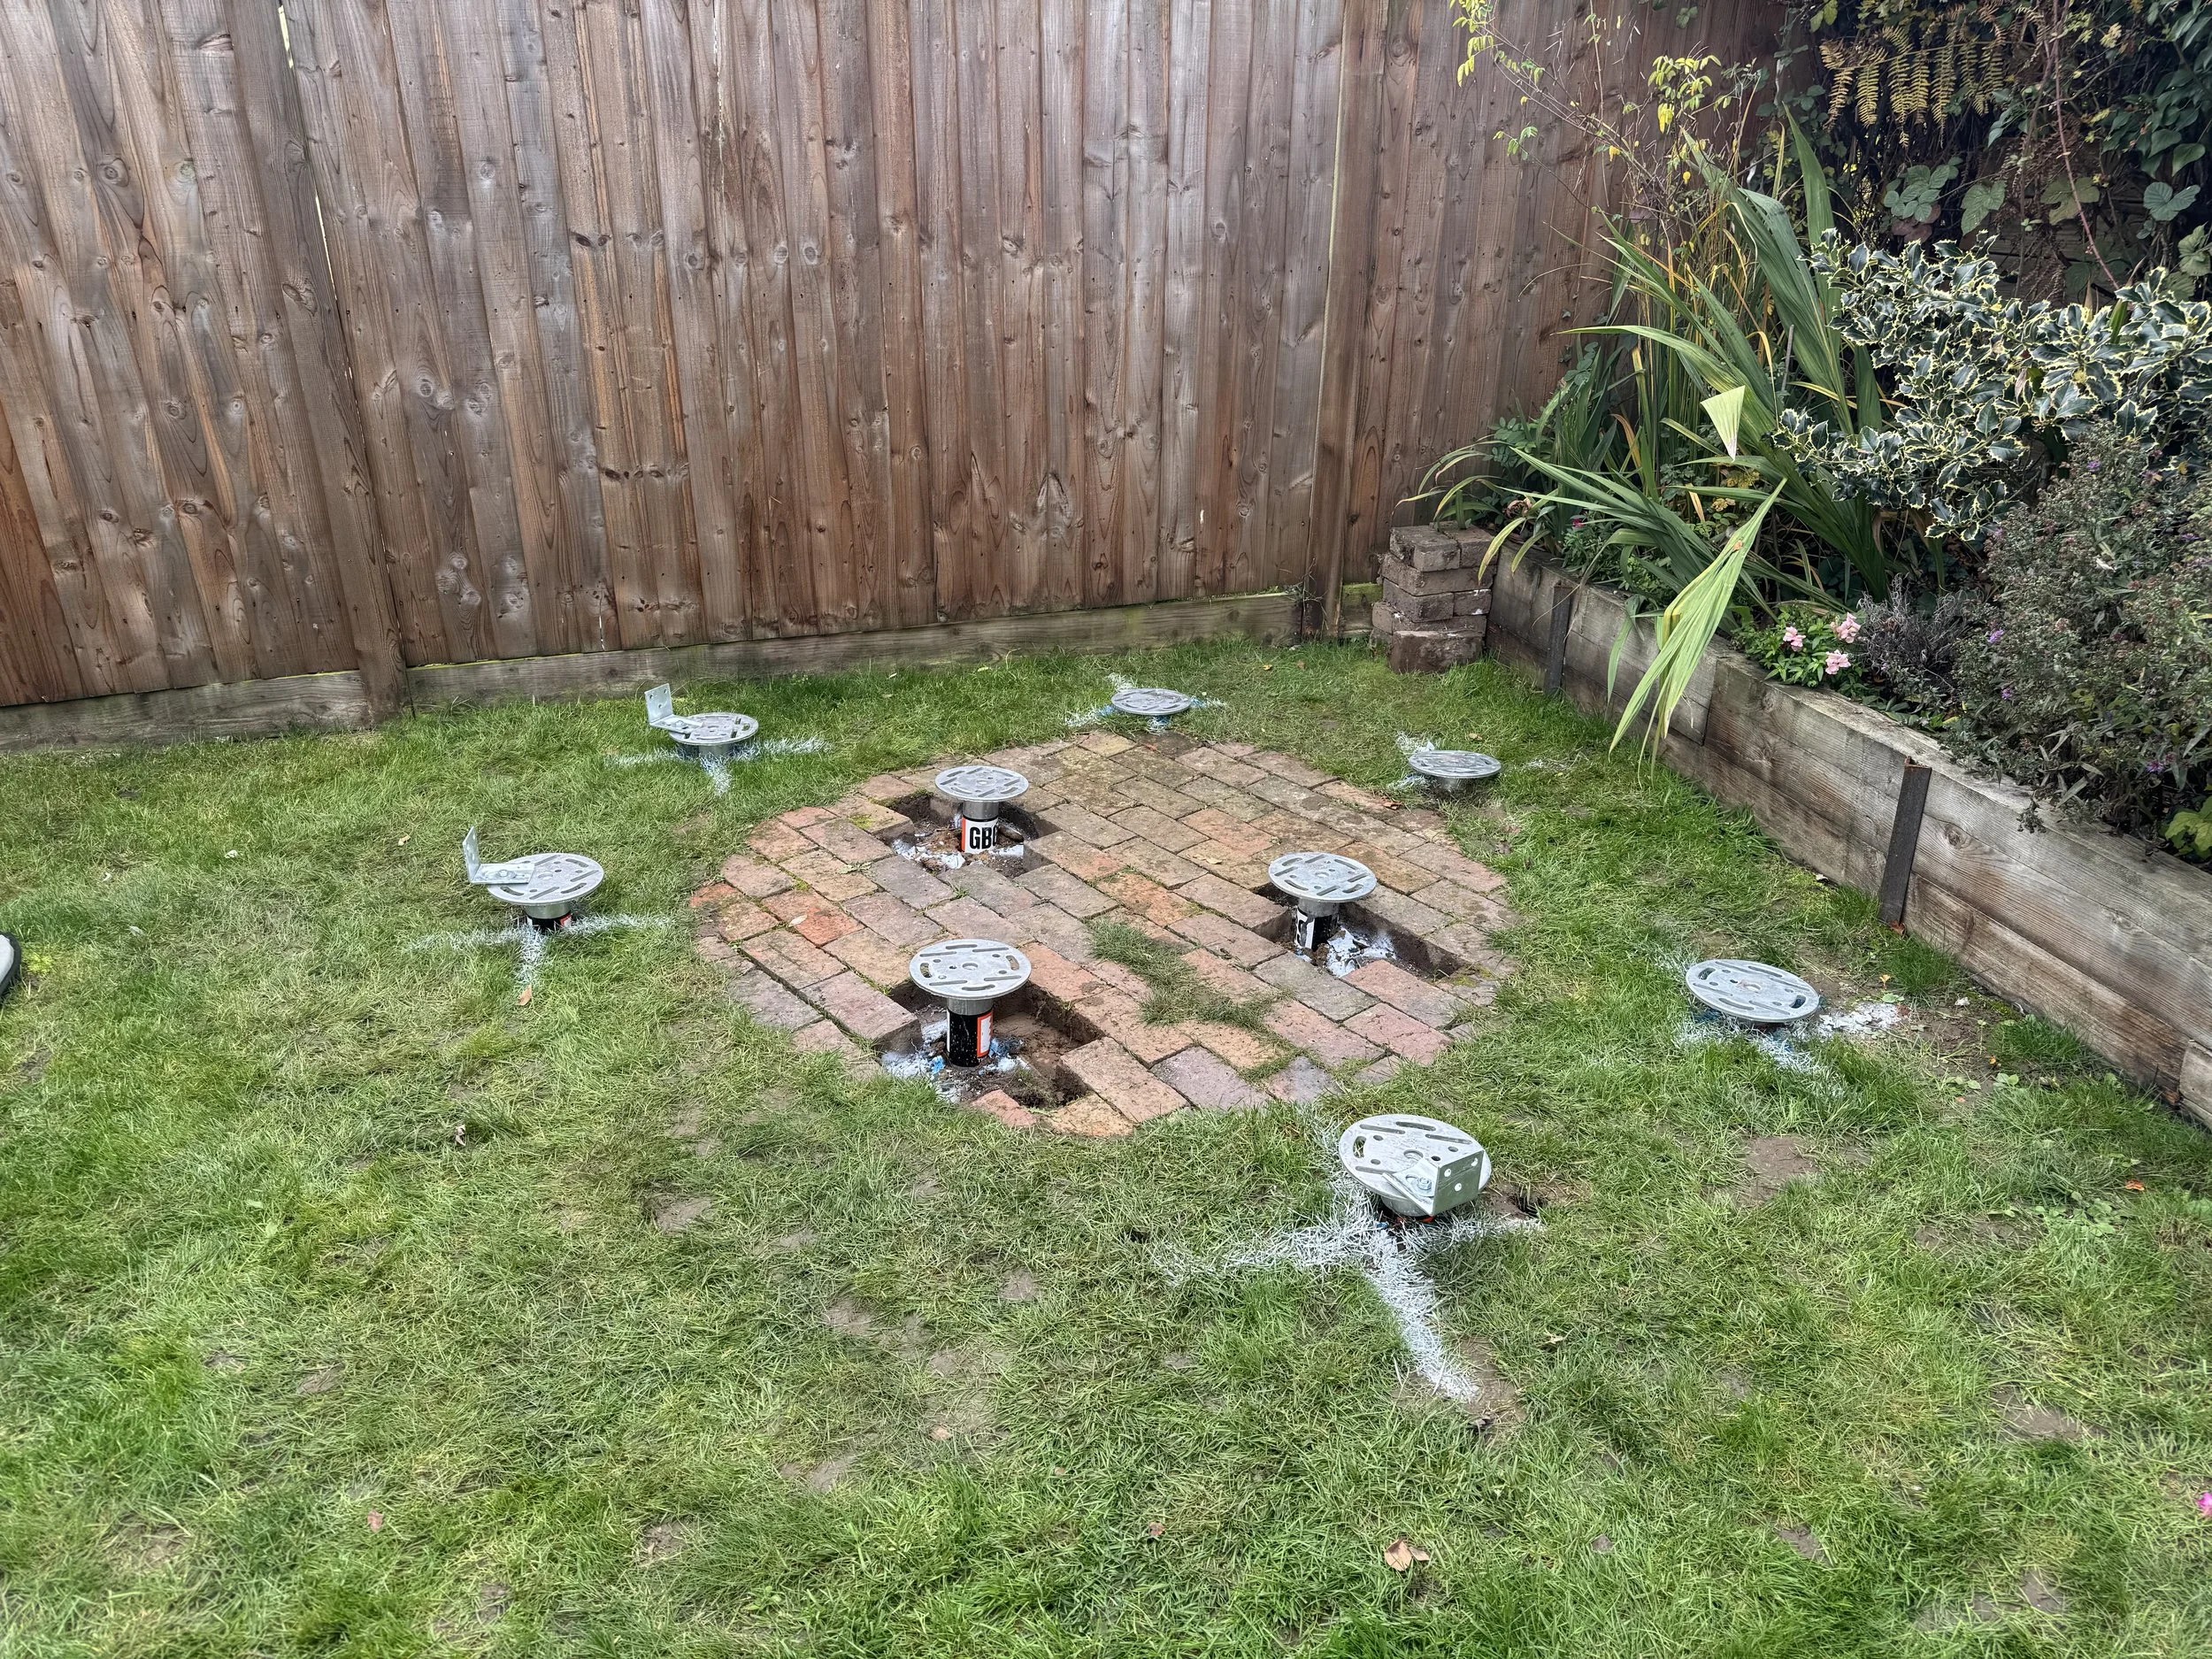
Ground Screws:
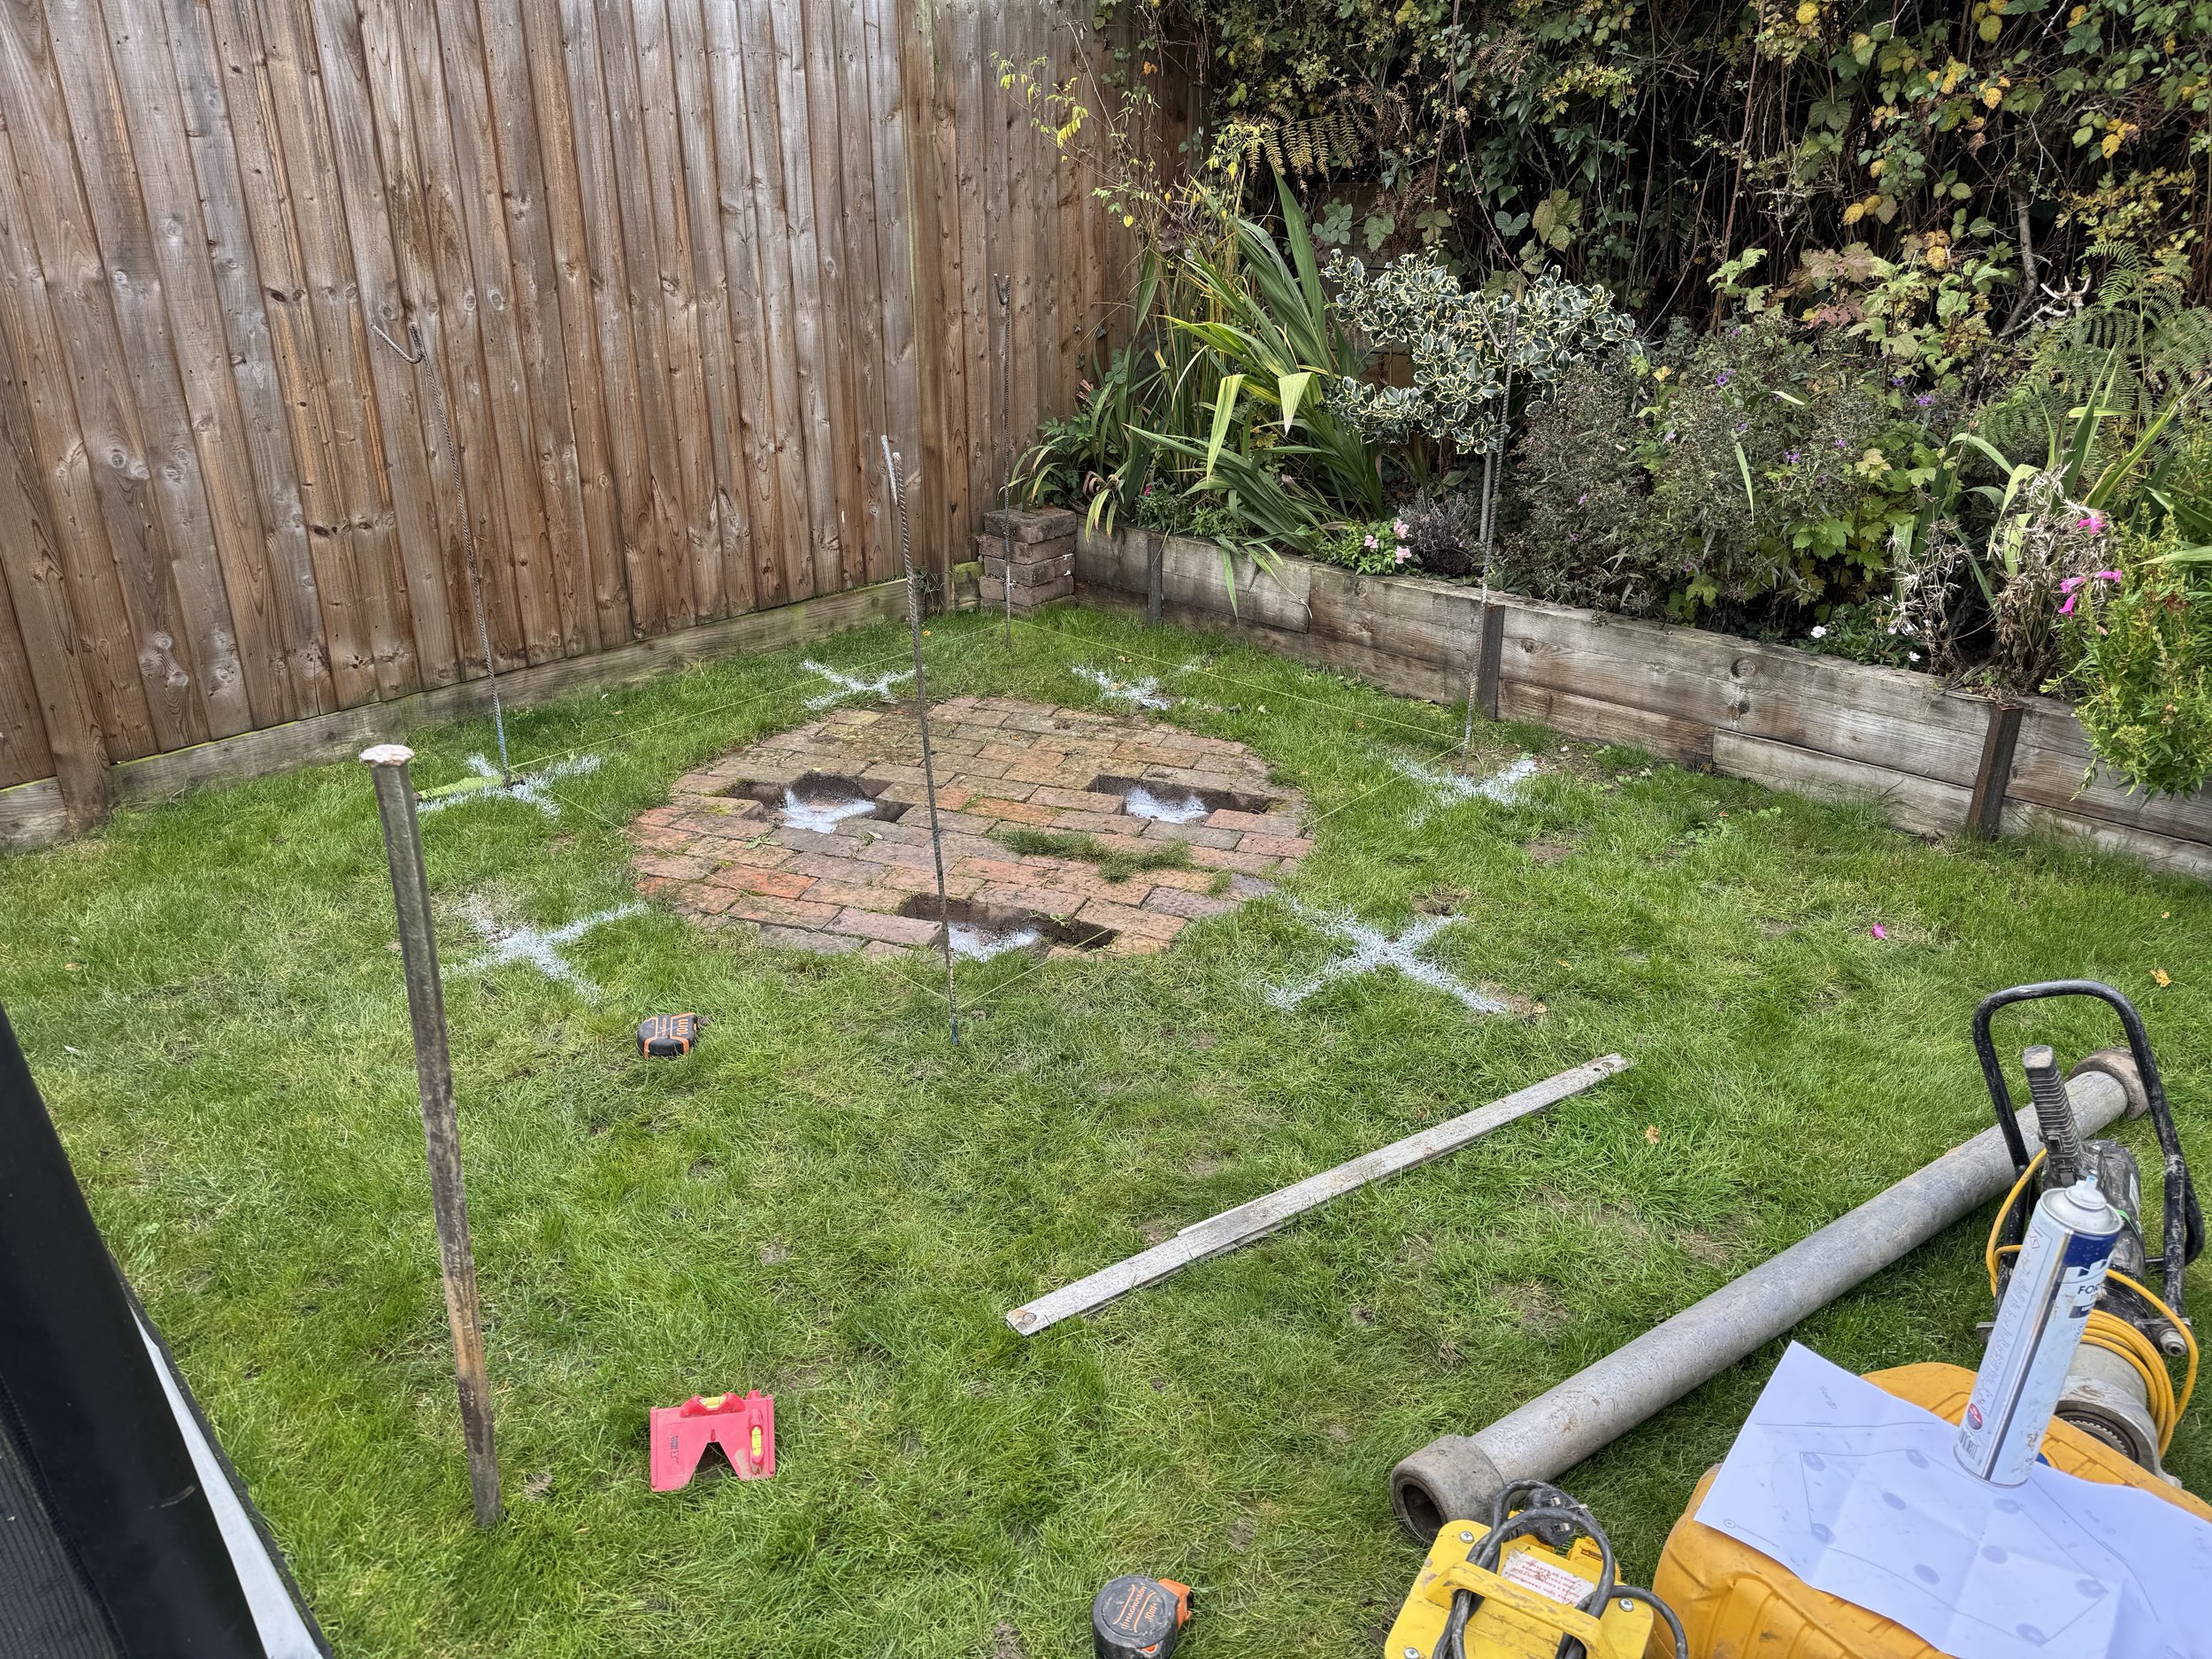
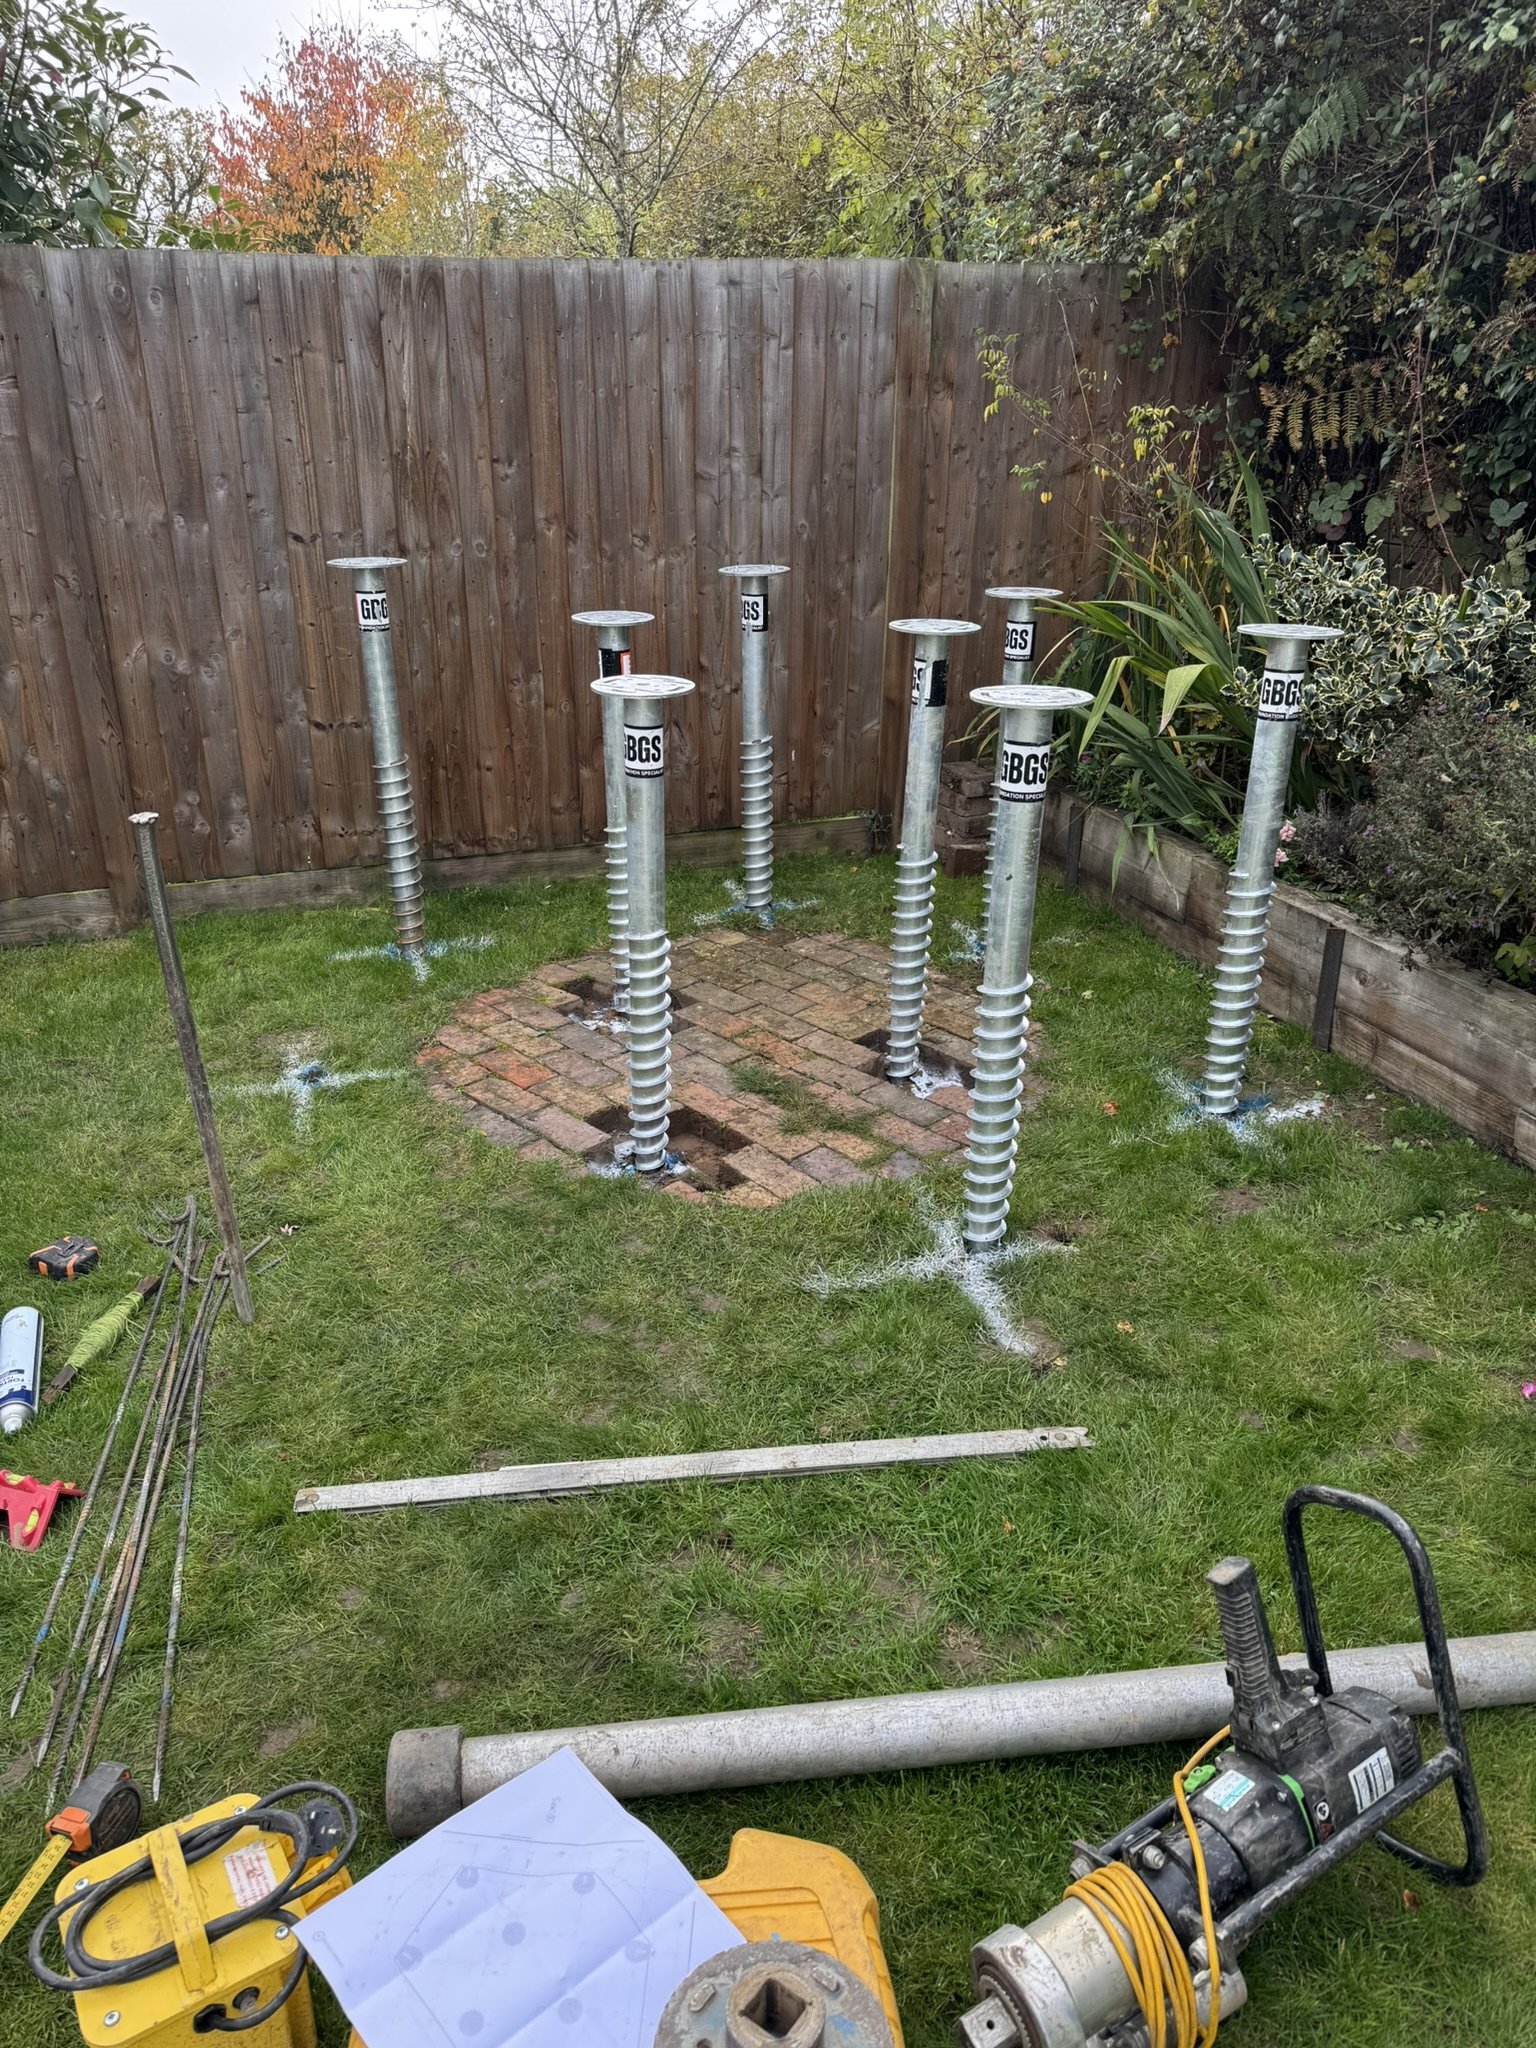
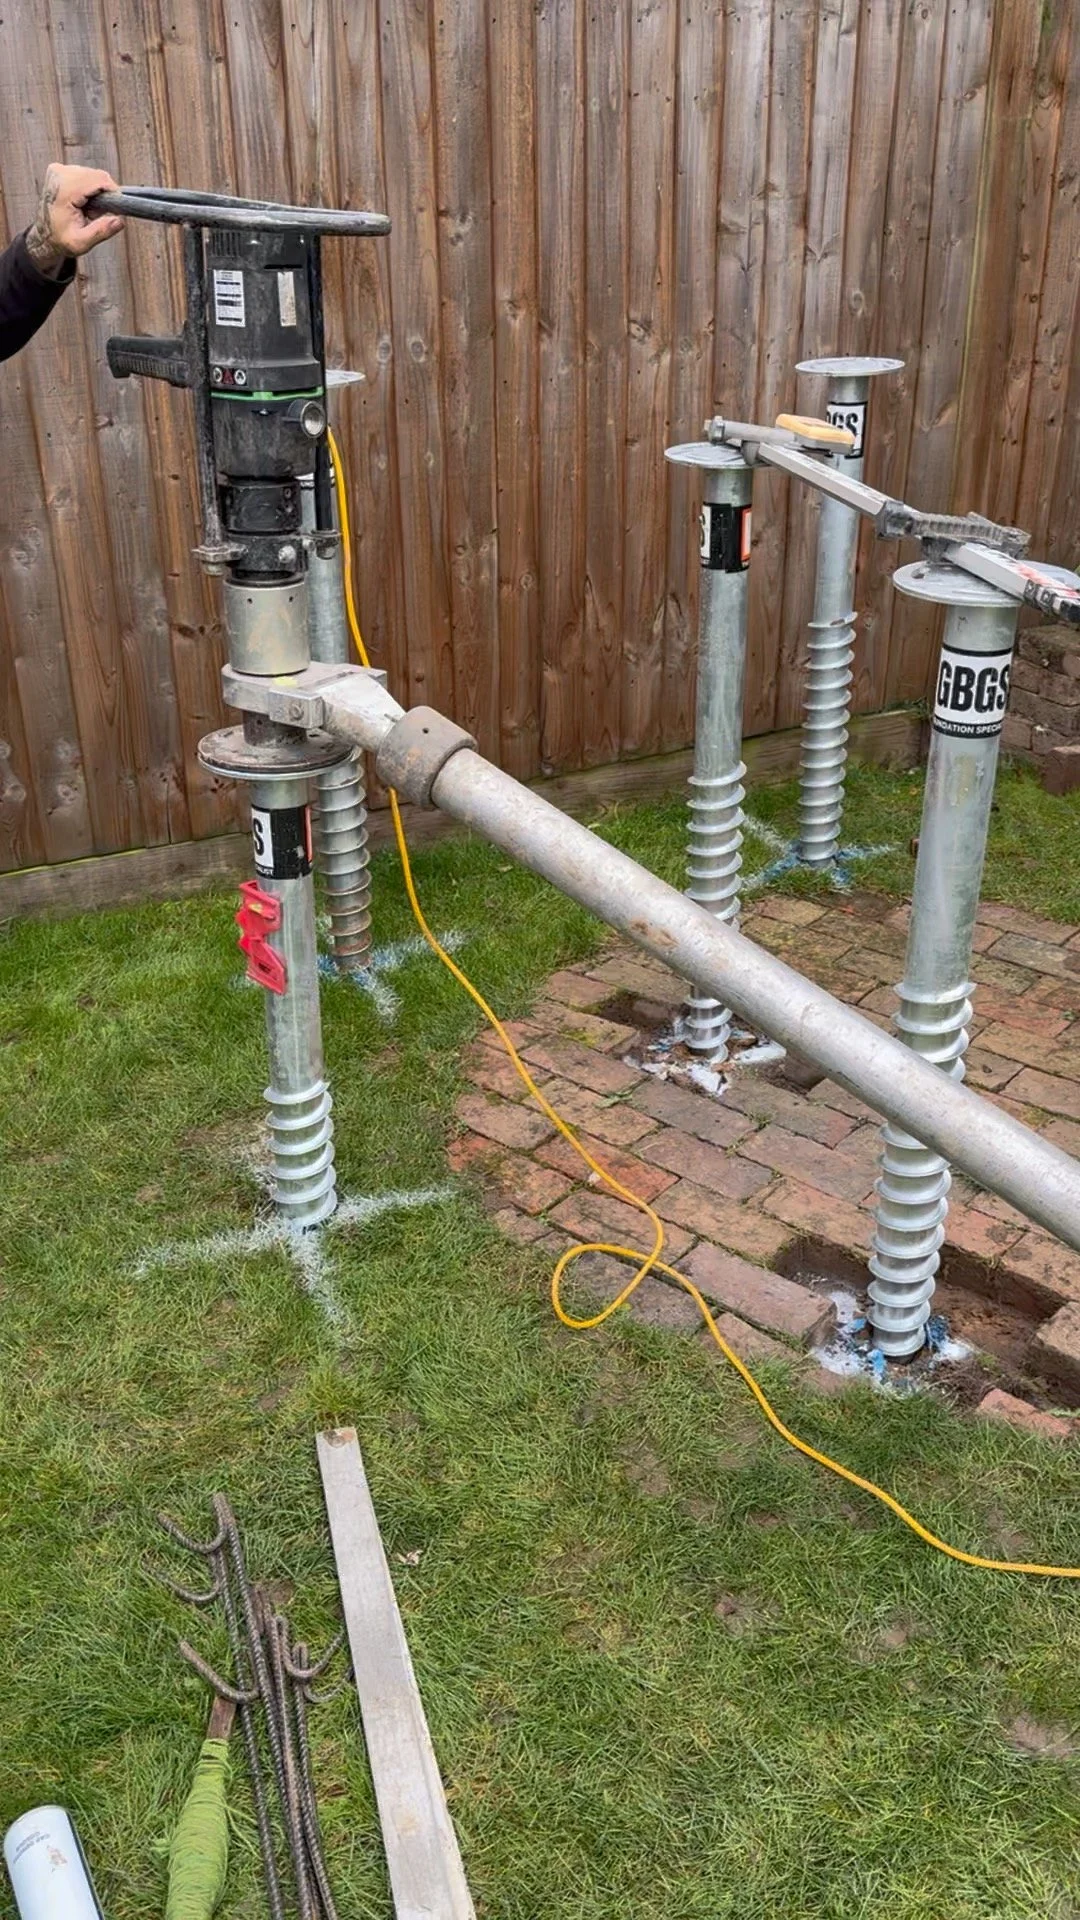
Time: 2 hours
Cost: ~£1050
Installer: Great British Ground Screws
Adrian's notes:
“What surprised me most was the speed of install. 2hrs total from nothing to 9 ground screws installed and no mess whatsoever. I would definitely recommend ground screws to anyone.”
Key learnings:
Ground screws offer ±10mm accuracy - The brackets have built-in adjustability for perfect fit with SIPs panels - No concrete, no excavation, no mess - Faster and more sustainable than traditional foundations - The solution is cleaner, greener, and less labour intensive
Technical details:
“Our ground make-up is topsoil on clay on stiff to very stiff clay, which GBGS told us is their preferred ground make-up as the screws actively screw into and pull themselves into the ground.”
Build Diary December 2025:
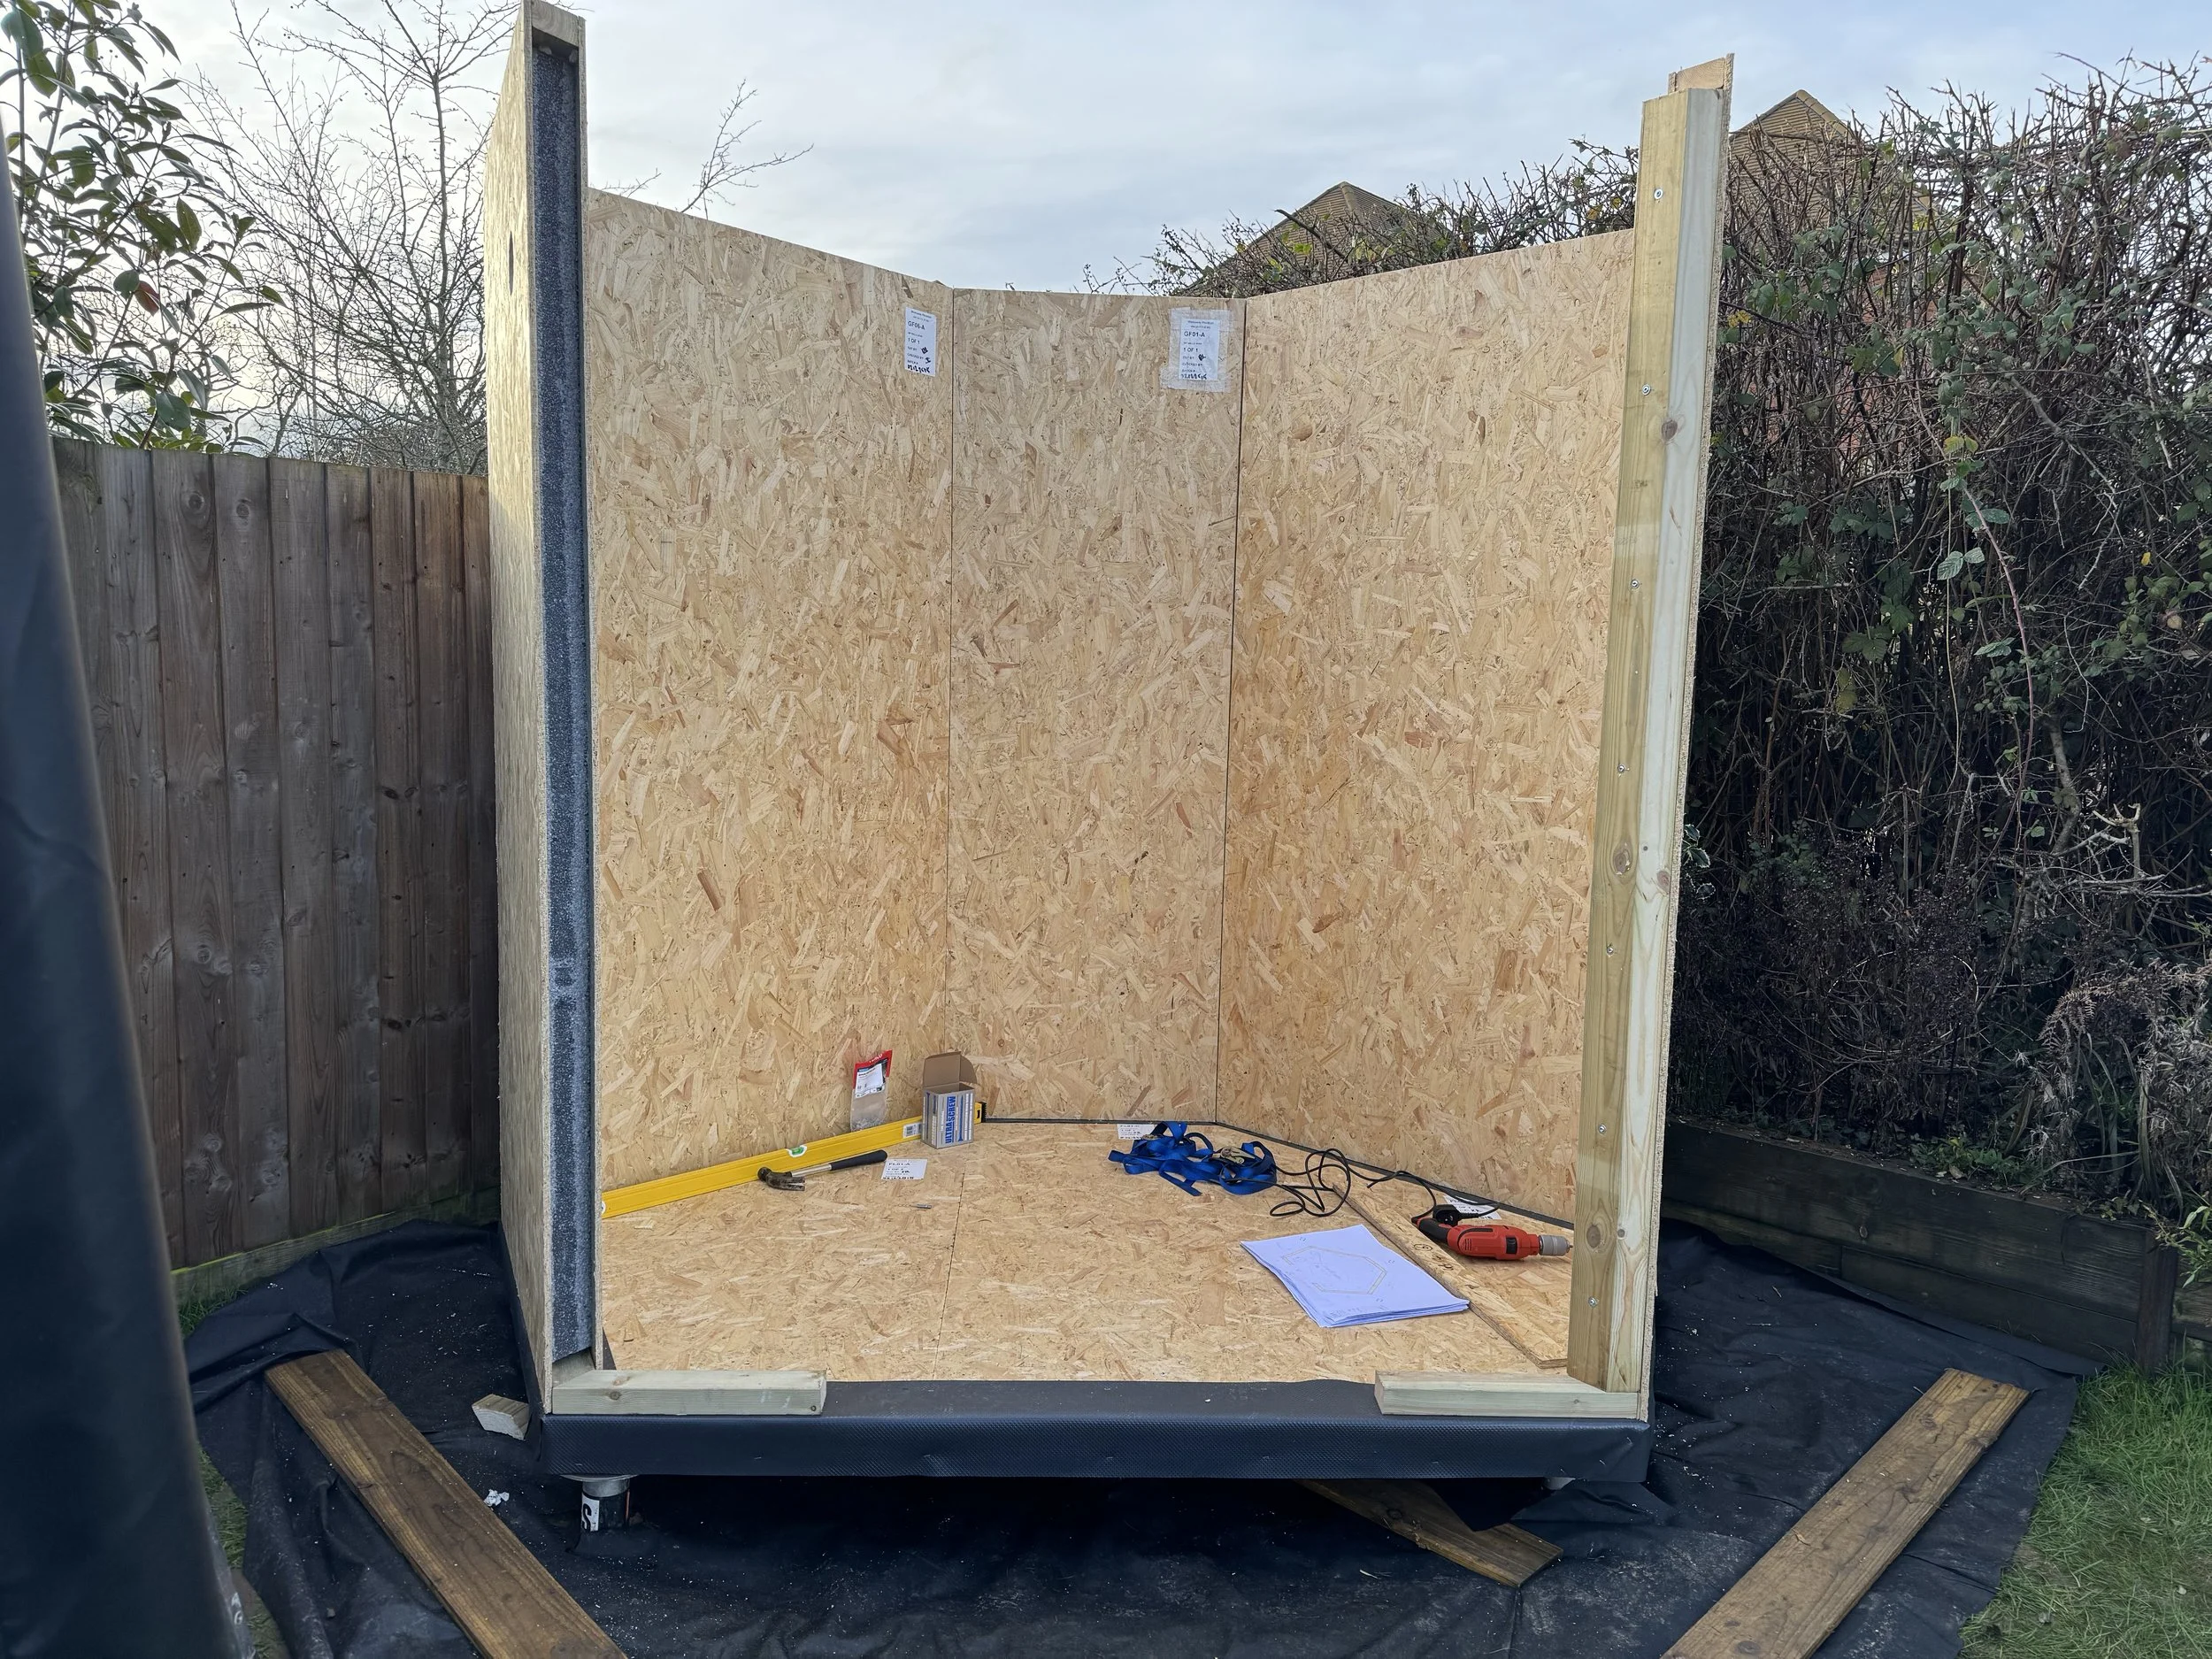
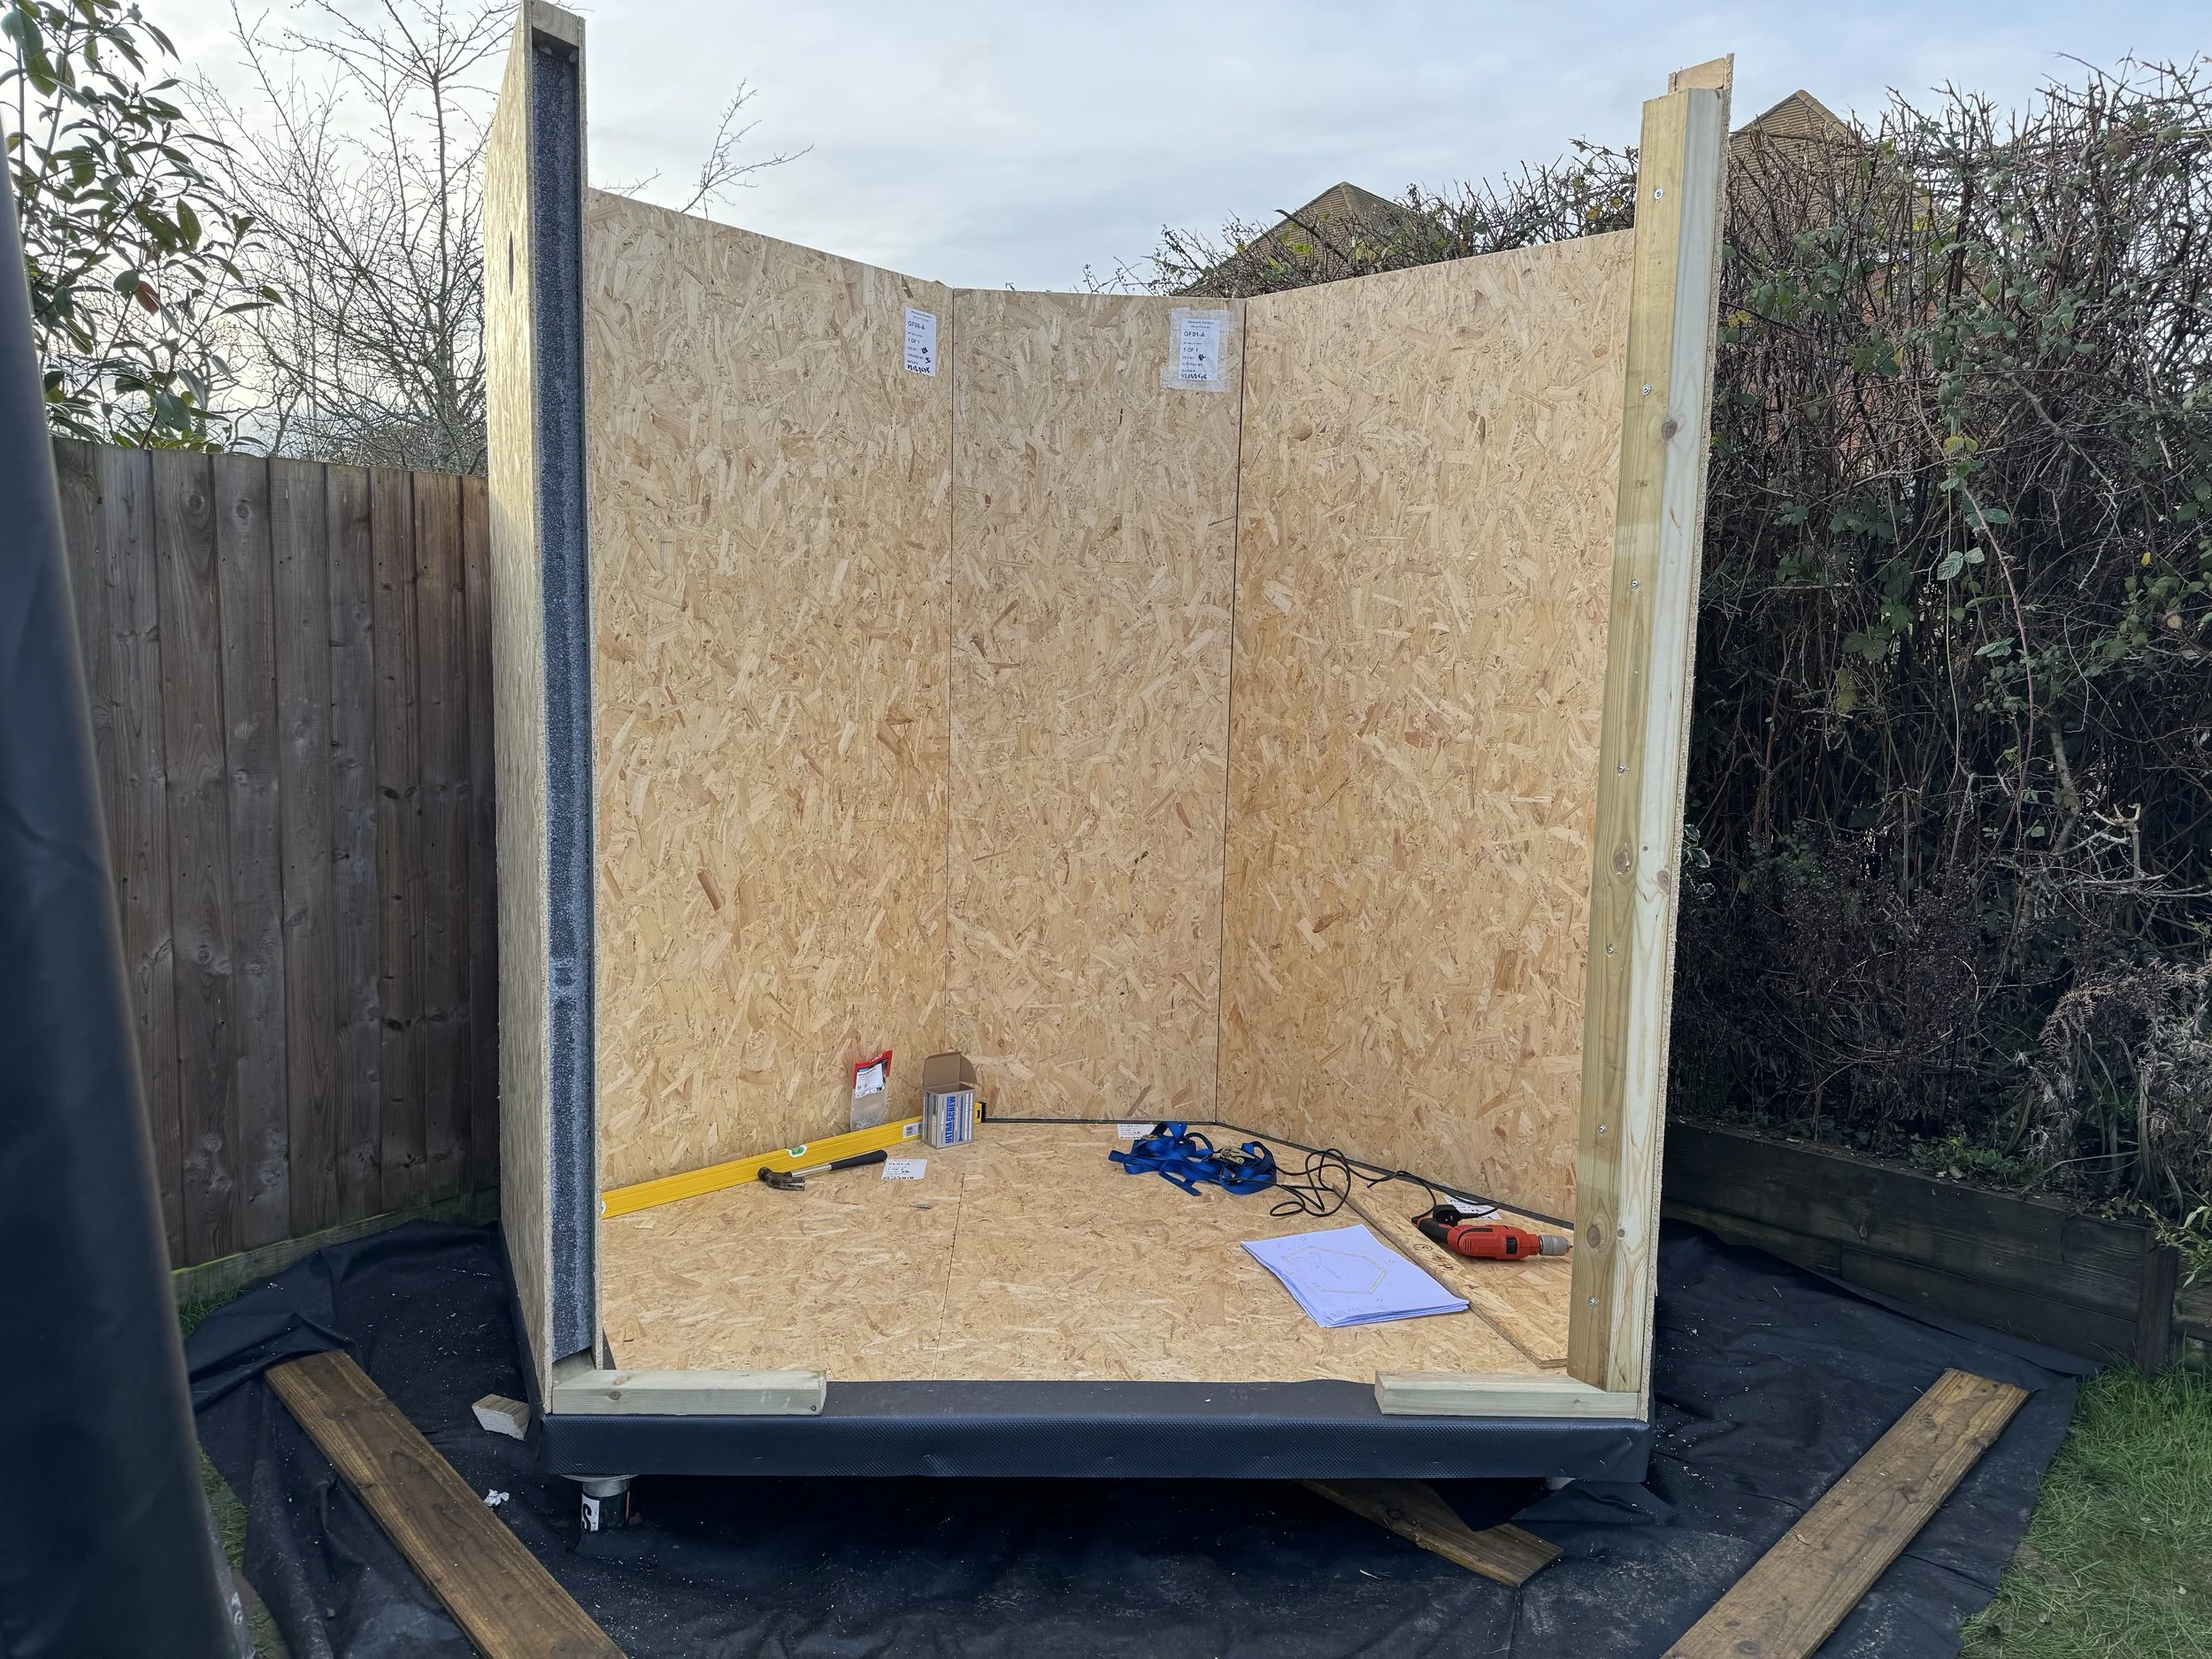
SIPs floor and wall panels erected
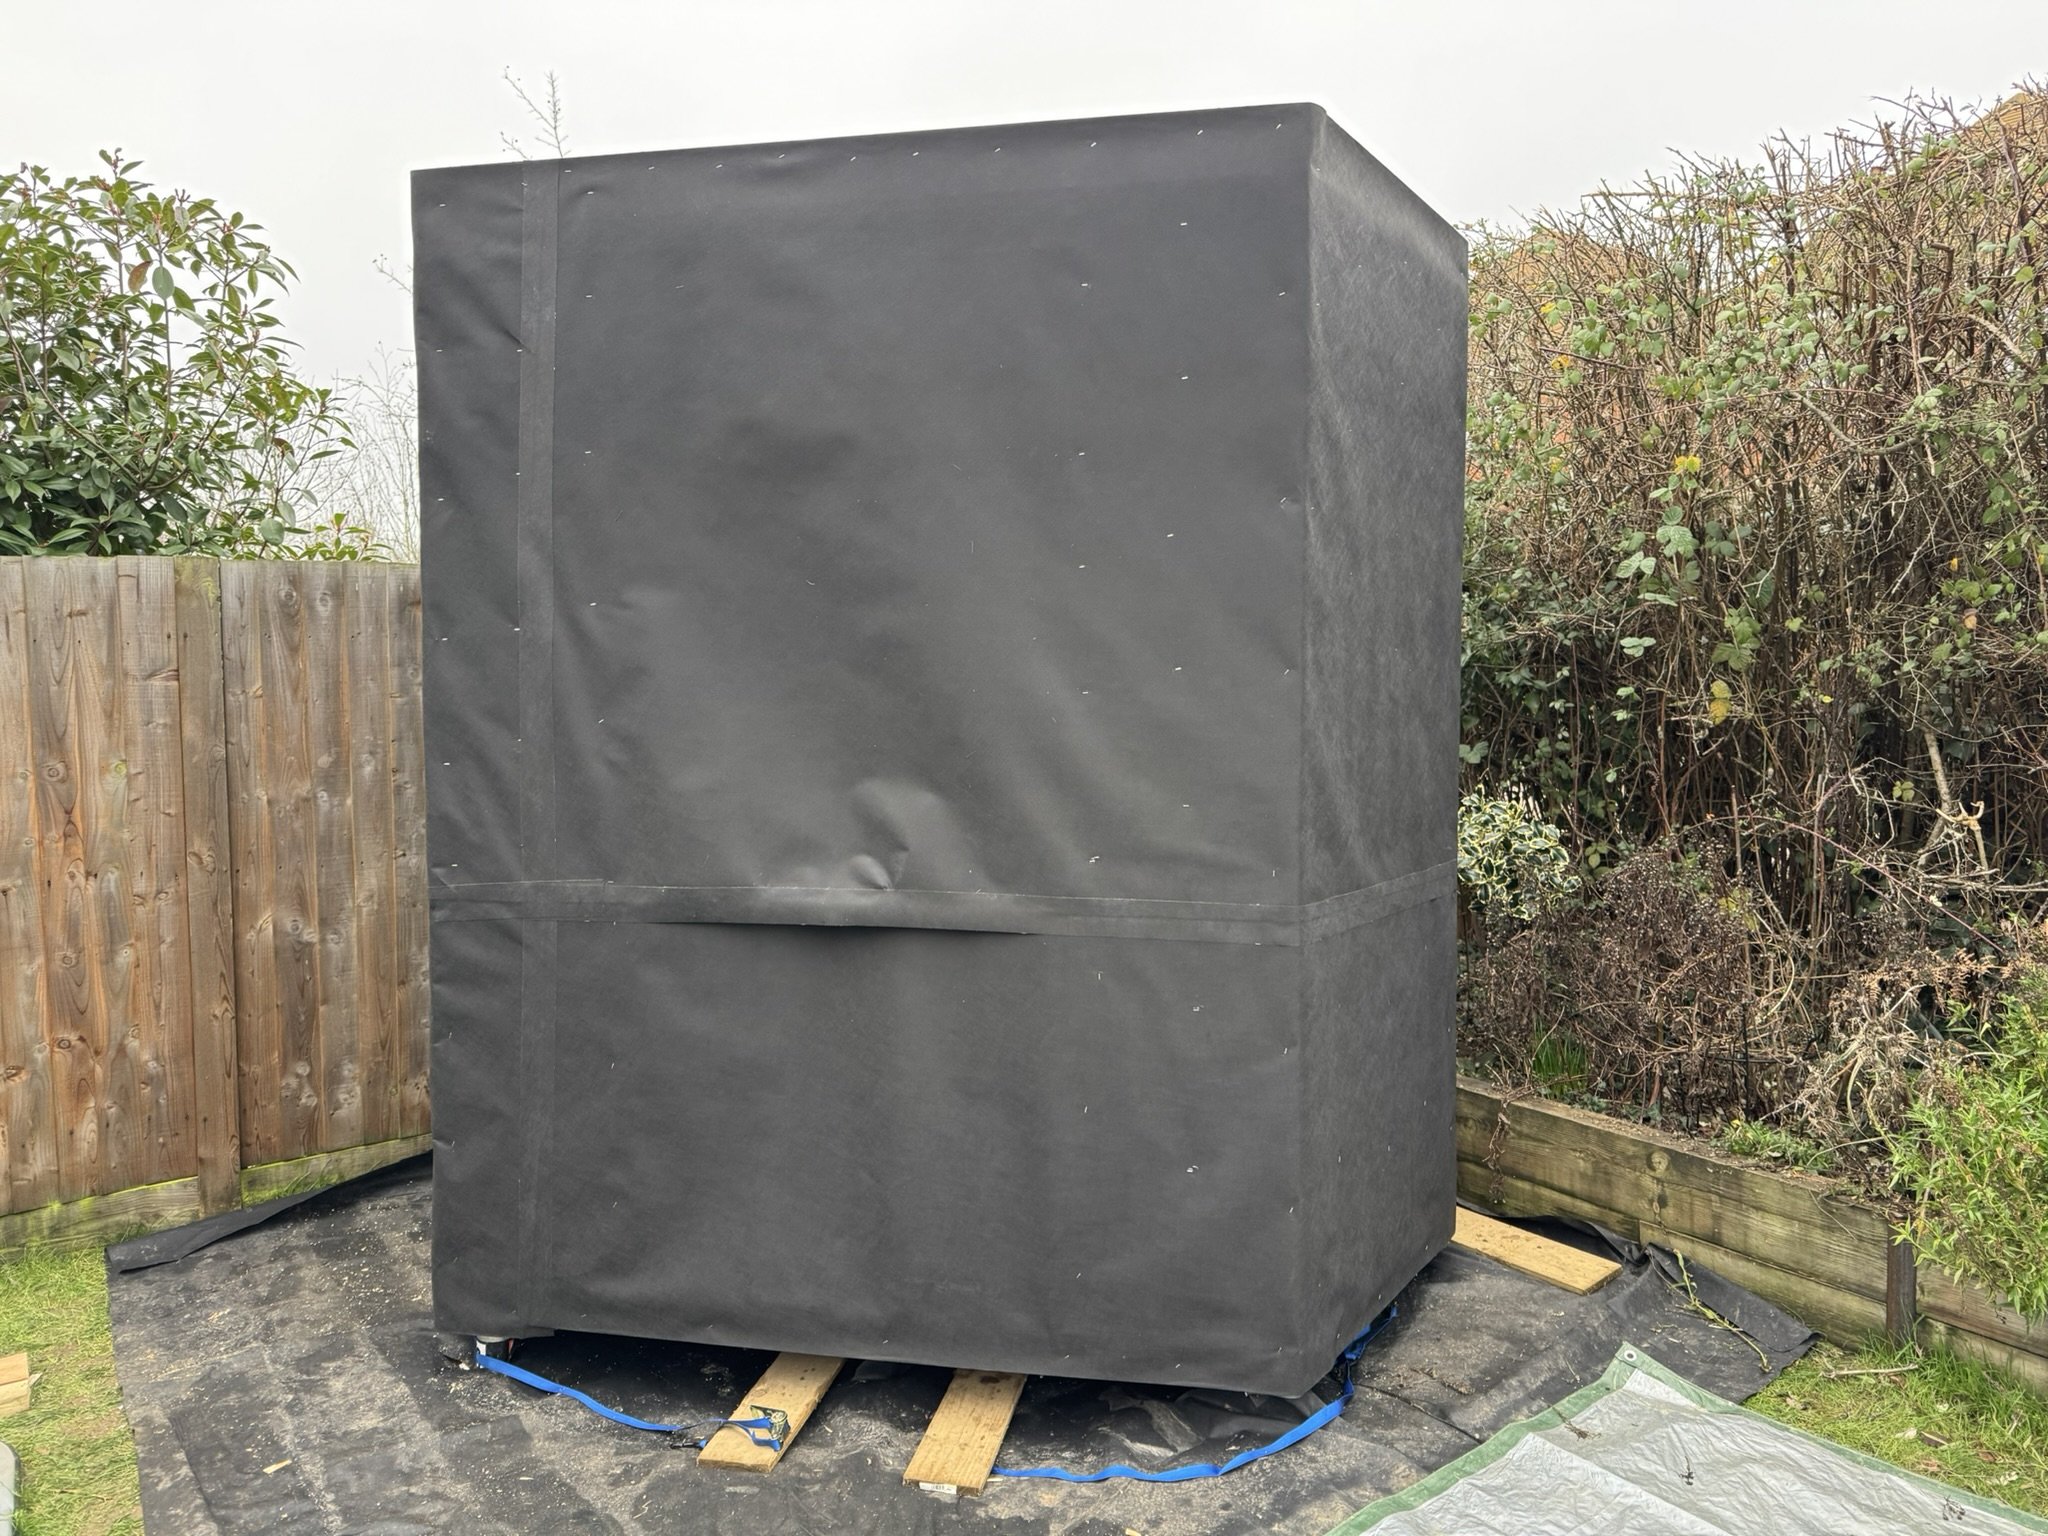
SIPs complete and weather tight membrane fixed
Structure Erected:
Time: 23 hours over 2 days
Team: 4 people used to lift roof panel
Materials: SIPs panels from Ecologic
Adrians Notes:
Day 0 (~3 hours): Prepared the area around the ground screws by removing old brick surface and turf to ensure approximately 50mm below the top of all ground screws. Placed membrane to prevent weed growth beneath the structure.
Day 1 (~10 hours): Pre-built the floor, walls and roof SIPs panels according to Ecologic build drawings. Applied expanding foam insulation to timber splines, glued internal OSB faces and nailed external OSB faces.
Day 2 (~10 hours): - Lifted floor panel into place (initially upside-down) - Stapled Tyvek UV weatherproof membrane to underside and lapped up edge - Turned floor panel right way up and lowered onto ground screws - Floor panel checked - perfectly level in all directions and bearing onto all ground screws - Fixed floor panel to ground screw brackets - Stapled DPC membrane to floor panel - Fixed SIPs wall panel sole plates to floor - Lifted each wall panel in sequence, sliding into adjacent wall panel spline - Used ratchet strap around perimeter to pull all panels together - Checked all wall panels for plumb and level - Lifted roof panel onto wall panels (4 persons required) - Wrapped entire structure with Tyvek UV weatherproof membrane - Placed temporary tarpaulin over roof
“All walls ended up being perfectly plumb and level! The WorkAway construction pack suggested minimum of two persons for roof lift - in reality due to the height and weight of the lift I would suggest that a minimum of three and ideally four persons are required.”
Key learning:
SIPs construction is remarkably precise when foundations are properly set out. The ratchet strap technique effectively closed all internal joints for a tight, weatherproof assembly.
Build Diary March 2026:
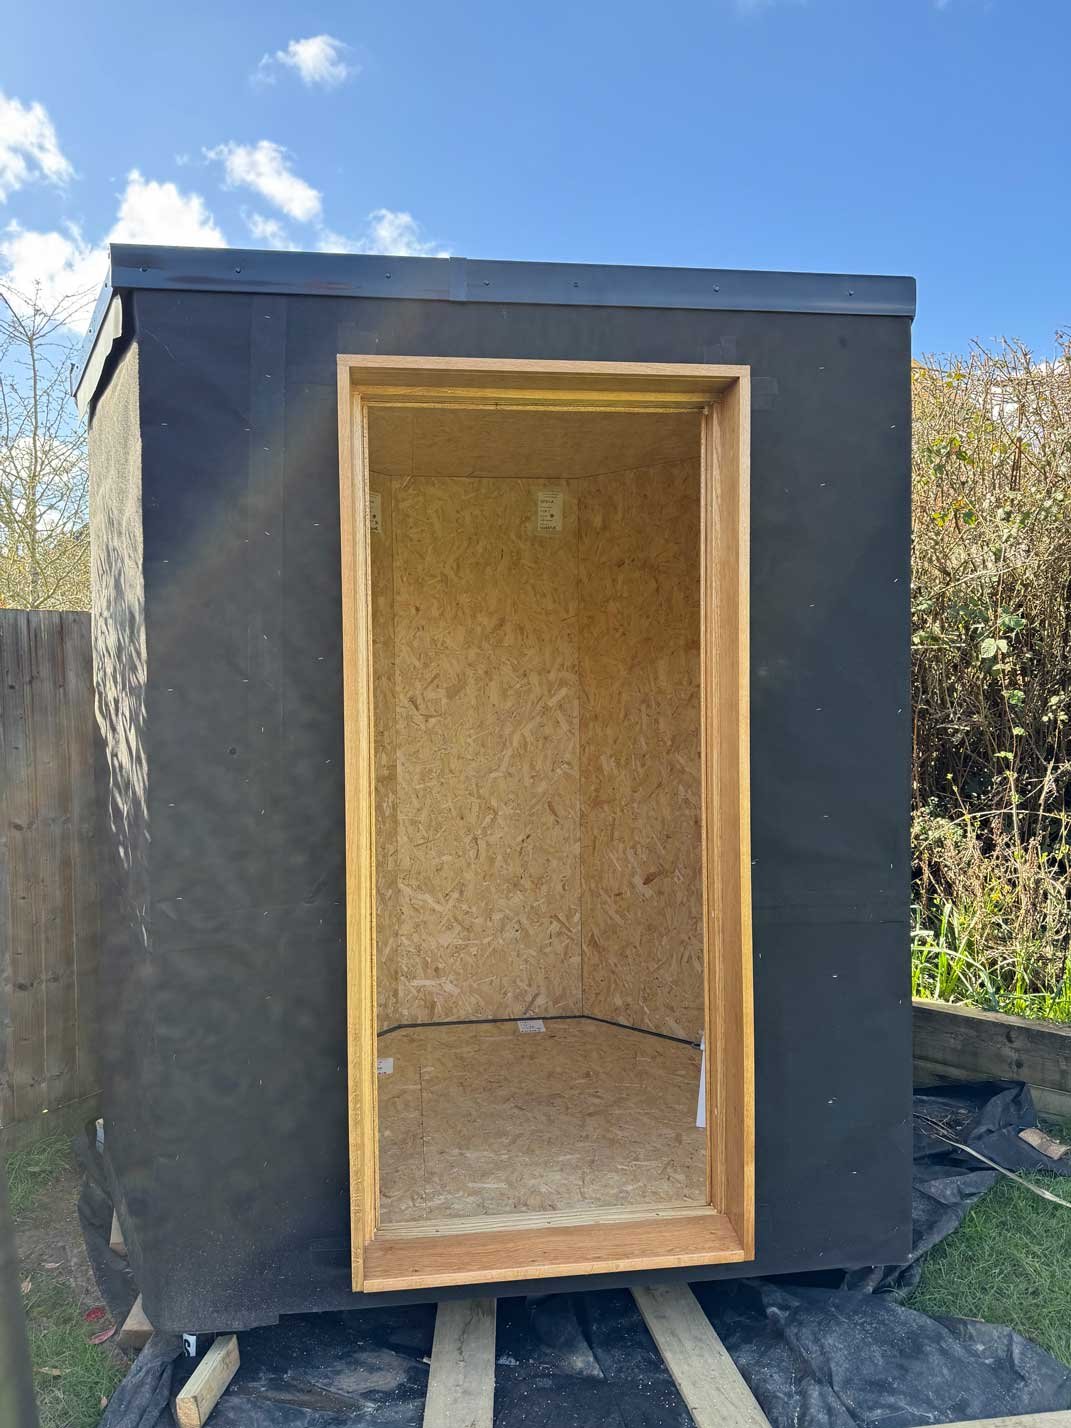
Roof on, door lining and frame in
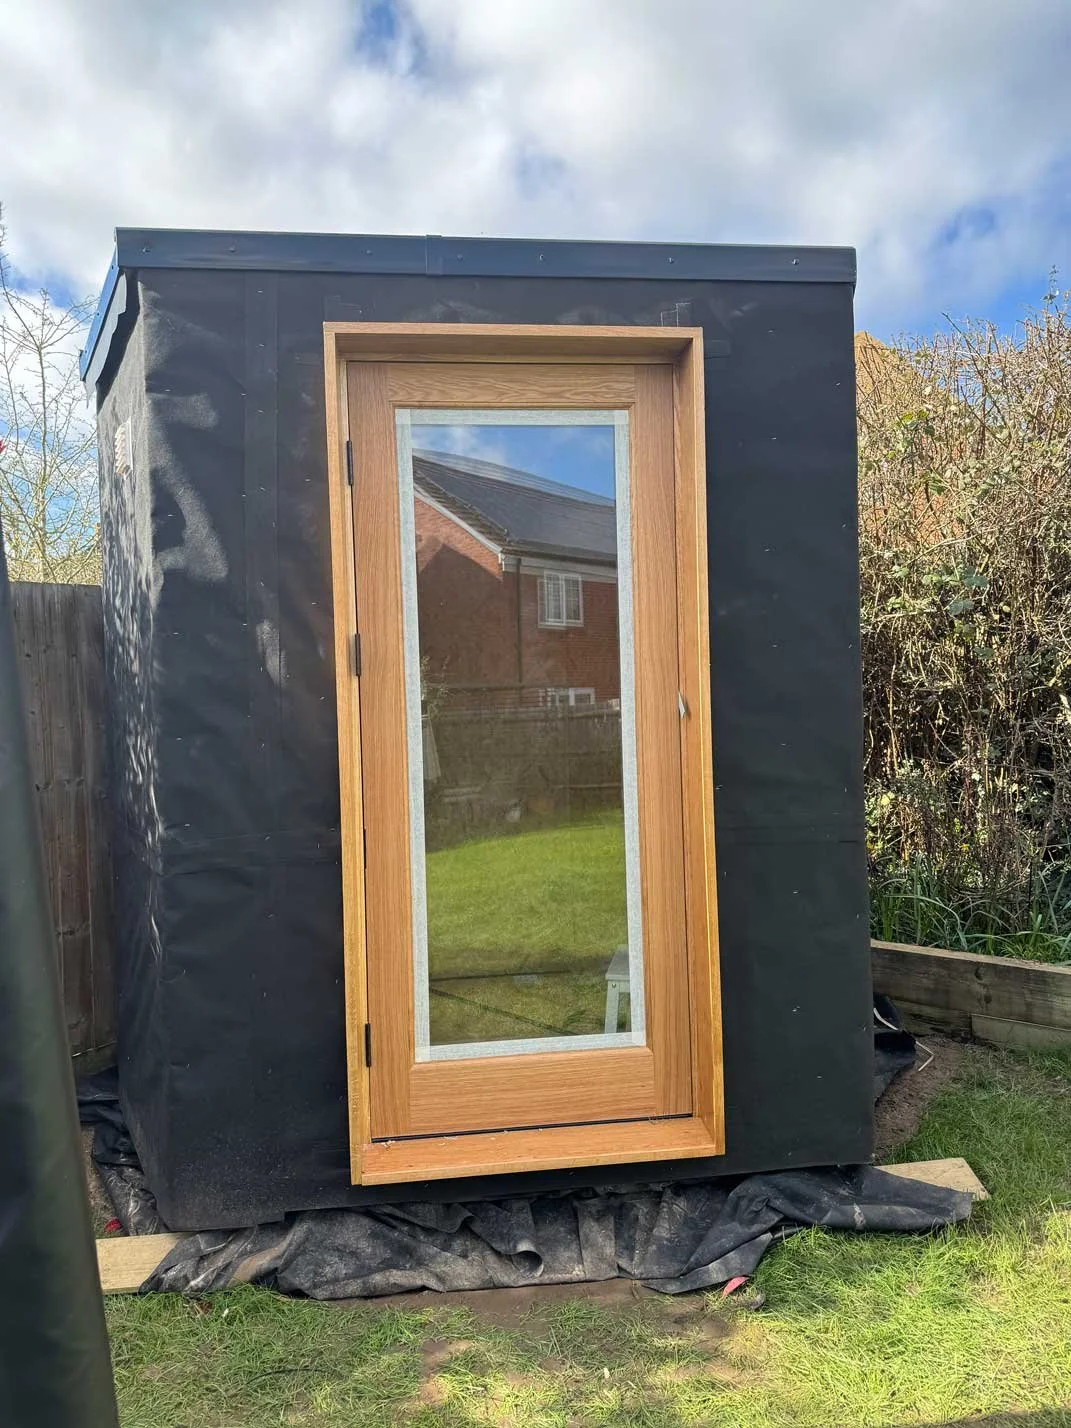
Door and lining complete
Roof, Door & Glazing
Time: 2 weekends
Adrian resumed the build as the weather improved after a Christmas break.
EPDM roof and edge trims fitted, per the manufacturer's recommendations - no issues
Door frame and door lining made up and fitted - no issues
Glazed door and air breather vent fitted - no issues
Adrian's notes:
Adrian's fabricator picked up a discrepancy on the door head trim and cill support bracket fabrication drawing before cutting - the 100mm dimension shown in the Top view didn't match the 127mm shown in the Cut through. Flagged and corrected.
Build Diary April 2026
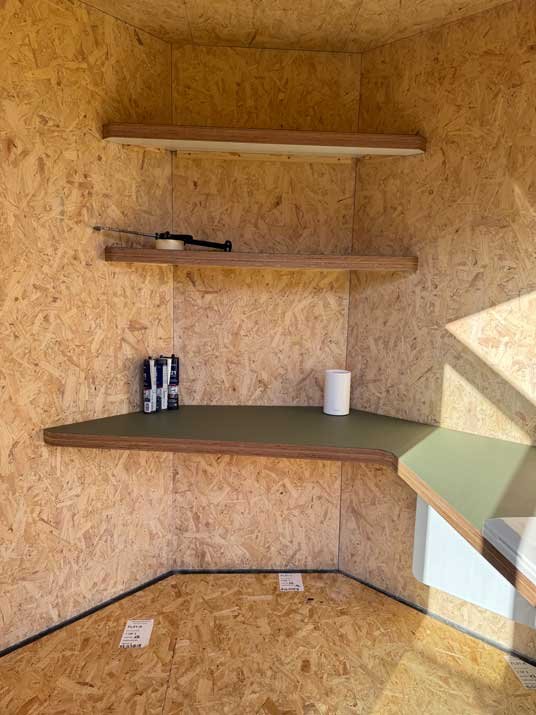
‘Work Ready’ package desk and shelves fitted
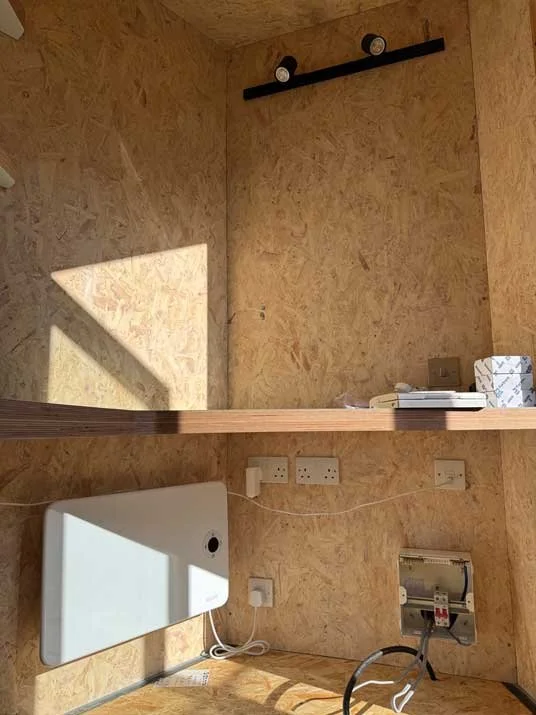
Lighting / Heating and electrics installed - Always use a qualified electrician for this bit.
Interior Finish & Electrics
Time: 1 weekend
Applied white Polyx oil to the internal walls and ceiling
Installed electrical and network cabling from the house to the office
Fixed battens and pre-wired the electrical panel
Fixed desk and shelves
Design note:
The white oil finish tones down the OSB beautifully and sits nicely against the green Adrian chose for the desktop.
Build Diary May 2026:
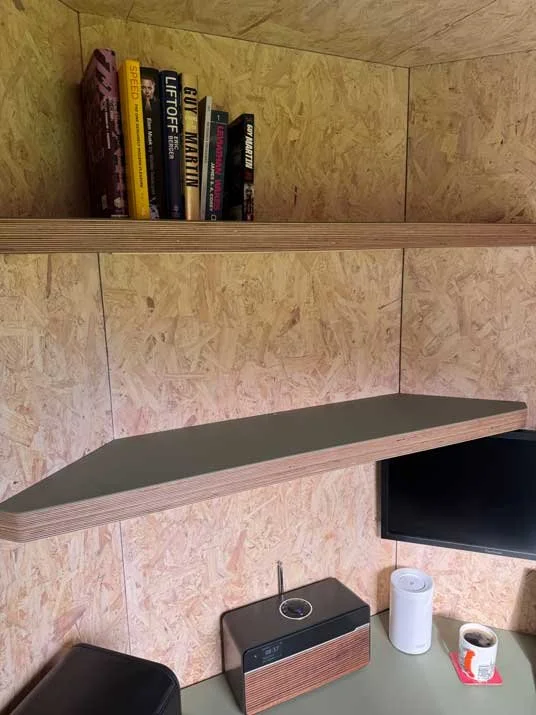
Adrian used a white stain on the OSB interior and Olive coloured desk and shelves
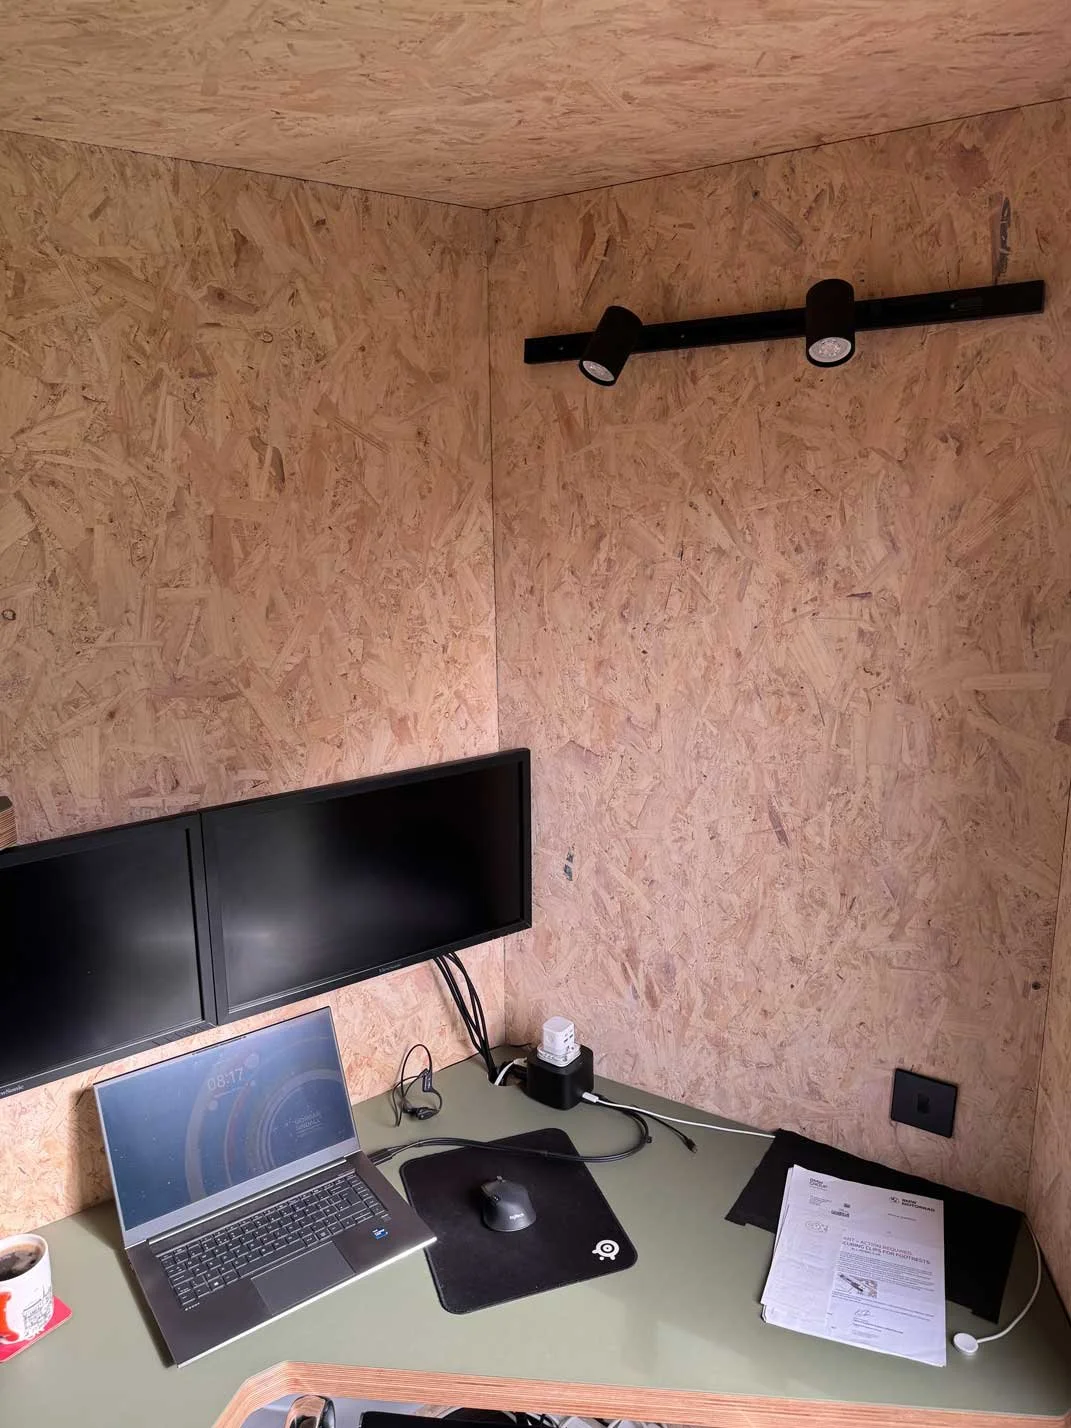
In daily use - making the pod his own
Time: in use for ~2 weeks
Adrian has now been working from the pod for a couple of weeks. Cladding is the one item still outstanding - the steel fabricator let the project down on the cladding support steelwork, so Adrian is back out for fresh quotes.
"Otherwise it is all good."
Current status:
In daily use since May 2026. Weathertight shell, roof, door, glazing and full interior fit-out are complete. Cladding is the final outstanding step, delayed by a steel fabricator issue - new quotes are being sought for the cladding support steelwork.
Next stages:
Cladding support steelwork (sourcing a new fabricator)
Corrugated aluminium cladding installation
Technical Feedback & Improvements:
Adrian's professional input helped us improve the plan pack:
Issue identified: Ground screw level specifications were unclear
Resolution: Ground screws level clarified by diagram in plan pack
Issue identified: SIPs corner fixing details not shown for angled walls
Resolution: Added fixing diagram to build sequence diagrams.
Issue identified: Membrane lap specifications contradicted between drawings
Resolution: Standardised all membrane laps to minimum throughout documentation
Issue identified: Door head trim and cill support bracket drawing showed conflicting dimensions - 100mm in the Top view vs 127mm in the Cut through
Resolution: Corrected drawing to show a consistent 127mm dimension across both views
These improvements are now included in all plan packs, benefiting future builders.
Want to Follow Self Build Journeys?
Follow Adrian and other Founding Circle members on our social media feeds or sign up for regular build progress notifications below.
Want to Build Your Own?
- the same drawings Adrian used are available as our complete Plan Pack for The Plectrum and The Pill.
What's included:
✓ License to build one pod
✓ Full architectural drawings (plans, elevations, sections, details)
✓ 21-step build sequence with checklists
✓ Glossary of 60+ construction terms
✓ Complete parts list with supplier links and product codes
✓ Email support throughout your build
✓ Guide to reading architectural drawings
✓ Planning permission flowchart
Join Our Founders Circle Now
Build at 40% off (£350) in exchange for documenting your journey like Adrian:
✓ Priority email support
✓ Free 1-hour consultation
✓ Featured on our Instagram
✓ Help improve the plan pack for future builders
Frequently Asked Questions
Q: Does Adrian have construction experience?
A: Adrian is a Civil Engineer, so he's familiar with reading technical drawings and managing construction projects, but this is his first garden office build. His professional background helps him follow the plans precisely.
Q: Is Adrian doing all the work himself?
A: Adrian is doing most of the work with help from friends and family for key stages requiring multiple people (roof panel lift, wall panel erection, etc.).
Q: How is Adrian finding the plan pack?
A: "The plan pack build sequence gave me a good idea of what to expect so no big surprises." He found the glossary, quick guides, and checklists particularly helpful.
Q: What tools and equipment are needed?
A: Standard DIY tools (drill, saw, level, tape measure), plus some specialist items like ratchet straps for wall assembly. Ground screws require specialist installation (GBGS provides this service).
Q: How long will the complete build take?
A: The weathertight shell took just 2 days. From there, Adrian completed the roof membrane, door and glazing in March 2026 and the interior fit-out (electrics, desk, shelves) in April 2026, moving in and working from the pod by May 2026. Cladding is the last remaining step, delayed by a steel fabricator issue outside Adrian's control. In total Adrian spent 7-8 days working on the pod at weekends.
Q: Can you build in stages?
A: Yes - Adrian took a Christmas break after achieving a weathertight shell. This is one advantage of DIY - you control the pace.